How to complete a Dental Chart
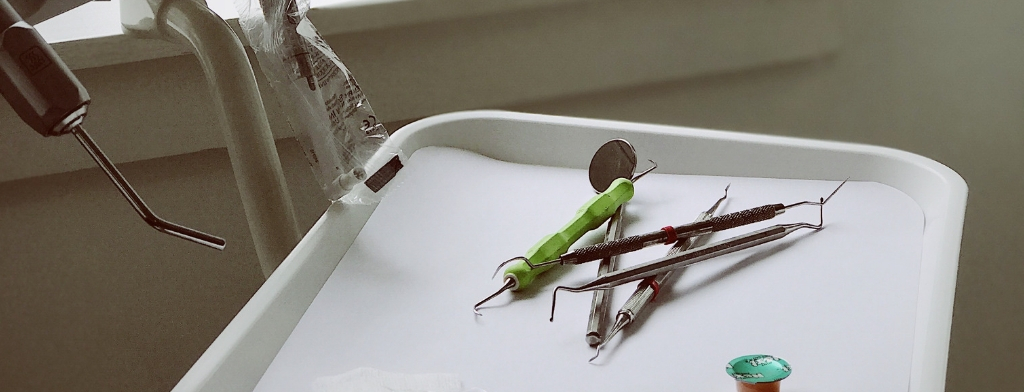
A dental chart is essential to optimally complete any dental veterinary procedure. Additionally, thorough oral examination can only be completed when under general anaesthesia. This oral examination includes periodontal probing, radiography and mobility assessment [1]. The outcomes of these activities should be recorded on a dental chart which can be used for future reference and/or treatment recommendations for the dog, cat rabbit or even the horse. A copy can also be given alongside radiographs to clients to clearly illustrate the patient's pathology. To complete a dental chart to the optimum standard there should be 2 people present to complete the oral examination [2]. One person observes and evaluates the teeth and mouth whilst the other records the pathology of each tooth on a dental chart. Examination under anaesthesia involves using two tools; a dental explorer for examining the teeth and a periodontal probe to examine pocket depth and furcation exposure [2]. Dental radiographs are also needed alongside clinical findings to identify an accurate explanation of periodontal staging and other abnormalities [3].
How to complete a Dental Chart
A dental chart is essential to optimally complete any dental veterinary procedure. Additionally, thorough oral examination can only be completed when under general anaesthesia. This oral examination includes periodontal probing, radiography and mobility assessment [1]. The outcomes of these activities should be recorded on a dental chart which can be used for future reference and/or treatment recommendations for the dog, cat rabbit or even the horse. A copy can also be given alongside radiographs to clients to clearly illustrate the patient's pathology. To complete a dental chart to the optimum standard there should be 2 people present to complete the oral examination [2]. One person observes and evaluates the teeth and mouth whilst the other records the pathology of each tooth on a dental chart. Examination under anaesthesia involves using two tools; a dental explorer for examining the teeth and a periodontal probe to examine pocket depth and furcation exposure [2]. Dental radiographs are also needed alongside clinical findings to identify an accurate explanation of periodontal staging and other abnormalities [3].
Steps involved in the Dental Examination and Procedure
- Peri-operative therapy
- Dental charting (dental and periodontal examination)
- Peri-odontic therapy and procedure documentation
- Treatment summary and plan
Peri-operative Therapy
Peri-operative therapy occurs during the time of the dental and periodontal examination whilst the patient is under local or general anaesthesia. Local anaesthesia is not as widely used in veterinary medicine therefore general anaesthesia is normally used for dental procedures [2]. local anaesthesia is more often used after a dental procedure to help with pain management [1]. A pre-anaesthetic examination is important to determine the suitability of certain drugs to a patient. Anaesthesia should be tailored to individual requirements, any co-existing diseases and the availability of drugs. Whilst under anaesthesia, the patient's fluids and vitals need to be closely monitored to avert any complications that may occur during the procedure. Fluids can be monitored via an intravenous catheter to provide the dental patient with necessary fluids, emergency drugs, anaesthetics and antibiotics during surgery [2]. Dental radiographs can also be taken during this time using intraoral film or intraoral dental radiograph systems to help with visualising the extent of certain dental diseases [1].
Dental charting
A basic dental chart should include an image of the patient's dental anatomy. Each tooth can be numbered using the Triadan system [2]. An ideal dental chart also includes identifying the presence or absence of teeth, tooth surface irregularities and malocclusions. It should also indicate at what stage the patient had periodontal disease. Abbreviations can be used to identify any abnormalities. Additionally, a dental chart can include past dental history and further treatment recommendations.
Each tooth should be examined, starting from the upper right had side of the mouth known as quadrant 1 and then towards quadrant 2. Quadrant 2 represents the upper-left hand side. Next examining quadrant 3 which is the lower right-hand side and finally quadrant 4, the lower left-hand side [2].
Using the triadan system, there are three numbers that represent a tooth, the first one being the quadrant number, a second and the third represent the tooth number whereby the incisors are labelled as one and the more distal the tooth, the higher the number. For example, the first incisors on the bottom left hand side of the mouth is tooth 401. This inspection can be completed using a dental explorer and mirror. To examine the periodontitis, a periodontal probe can be used to measure furcation, mobility and most importantly gingival examinations and depth of each sulcus.
- Puppy and kitten feeding - e.g. switching to a low-calorie diet post-neutering since appetite will increase whilst caloric requirements decrease
- Adjusting feeding according to a Body Condition Score - e.g. if a body condition score is above 5, switching to a canned food diet which is low in calories and proportioned would be ideal
- Maintaining exercise and an ideal weight - e.g. have a set target of 15min walks every day for a week and then increase this time as the pet gets fitter
- Interactive awards over food as a reward in relation to behaviour training - e.g. offering affection over a treat
Dental Chart Examination Steps and Abbreviations
Below is a summarisation of the steps of a dental chart when reporting about each tooth
STAGE 1 - DENTAL EXAMINATION
- Identify tooth status, missing (O), extracted (X), and fractured (#) teeth and whether a tooth is deciduous.
- Then inspect the tooth for any abnormalities using a dental explorer and mirror and record these on the dental chart.
Calculus (measures the whole mouth)[3]
- C1 - some accumulation covering less than 1/3 of tooth surface
- C2 - moderate accumulation covering 1/3 - 2/3 of tooth surface
- C3 - heavy accumulation covering more than 2/3 of tooth surface
Plaque (measures the whole mouth)[3]
Tooth Reabsorption (for each tooth) [3,4]
Enamel [4]
Fracture [4]
STAGE 2 - PERIODONTAL EXAMINATION
A periodontal probe can measure the depth of the sulcus death of each tooth on 4-6 spots surrounding the tooth. In canines, the normal depth is less than 3mm and cats are less than 1mm [2].
Probing helps give the measurement of attachment loss as well as other functions such as mobility, furcation and identify dental caries which all contribute to periodontis [3]. Probing alongside dental radiographs can help identify these findings which are to be reported on a dental chart.
Mobility (for each tooth) [3]
Furcation (for each multi-rooted tooth)[3]
Gingivitis (measures the whole mouth) [3]
Periodontitis (measures the whole mouth)[3]
OTHER FURTHER EXAMINATIONS
Whilst undergoing the standard dental and periodontal exam, other tooth abnormalities and diseases may be identified and must also be indicated on the dental chart. Malocclusions and skull type, symphysis and temporomandibular palpation can also be recorded before tooth examination begins. Here are some further abbreviations [4]
CWD - crowding
DT - deciduous tooth
DTC - dentigerous cyst
GE - eosinophilic granuloma
GH - gingival hyperplasia
GM - gingival mass
MN/FX - mandibular fracture
MX/FX - maxillary fracture
OAF - oroantral fistula
OM - oral mass
ONF - oronasal fistula
ROT - rotated
RR - internal root reabsorption
RRT - retained root tip
RTR - retained tooth root
T/A - avulsed tooth
T/I - impacted tooth
T/LUX - luxated tooth
T/NV - non-vital tooth
T/PE - pulp exposure
T/V - vital tooth
Comments on any treatments and/or further surgery should also be recorded on the dental chart. The dental chart along with dental radiographs can be given to the client to retain transparency but should be comprehensive and straightforward.2 This dental chart will now be useful for dental exams in the future.
Peri-odontic therapy and procedure documentation [1]
Peri-odontic therapy involves treating the gingiva to optimally manage or prevent periodontal disease. This involves analysing dental radiographs along with the information taken from dental and periodontal examinations and then applying the individualised therapy. Firstly, calculus and plaque should be removed to prevent the aggravation of periodontal disease. Supragingival plaque and calculus can be removed with a hand scaler and subgingival plaque and calculus can be removed with a curette. Avoid aggressive curettage and scaling to prevent cementum removal. To prevent aggressive root planning, subgingival ultrasonic treatment can be used to disrupt the subgingival biofilm and ecosystem. After deep cleaning and scaling, crown polishing is necessary to reduce the microabrasions on tooth enamel. Subgingival irrigation should be performed to remove any debris. Therapy can also involve a gingivectomy-gingivoplasty, regenerative surgery, root planning periodontal flaps and/or the application of antimicrobials. Periodontal surgery may be necessary if there is significant damage to teeth or the gingiva. Any procedures performed should be indicated on the dental chart.
Some procedure abbreviations
B - biopsy
BG - bone graft
CR - crown
F - flap
FX/R - jaw fracture repair
GP - gingivoplasty
IMP - implant
R - tooth restoration
RAD - radiographs
RC - root canal
S - surgery
VP - vital pulp therapy
Treatment Summary and Plan
After finalising the dental chart, a treatment plant can be considered to ensure the pet owner is onboard with the home care. There should be four aspects to consider when devising a treatment plan. Home care involves the gold standard of daily brushing, a prescribed dental diet, dental chews, rinses and gels or a combination of these. Sometimes a primary care veterinarian should consider referring a patient to a specialist if the treatment is beyond their capabilities, if a pet owner' requested a higher level of care or if veterinary anaesthesiologist is needed to assist with the pet's other underlying diseases.1 After any dental procedure, pain medication should be considered to assist with pain management at home.
References:
[1] Bellows et al. 2019 AAHA Dental Care Guidelines for Dogs and Cats. J Am Anim Hosp Assoc. 2019 Mar/Apr;55(2):49-69. doi: 10.5326/JAAHA-MS-6933.
[2] Niemiec B et al. World Small Animal Veterinary Association Global Dental Guidelines. J Small Anim Pract. 2020 Jul;61(7):395-403. doi: 10.1111/jsap.13113.
[3] Caiafa A. Oral Examination/ Dental Charting Diagnostic Tools. World Small Animal Veterinary Association World Congress Proceedings. 2013. https://www.vin.com/apputil/content/defaultadv1.aspx?pId=11372&id=5709744
[4] The American Veterinary Dental College. Approved Abbreviations. https://avdc.org/resident-services/